
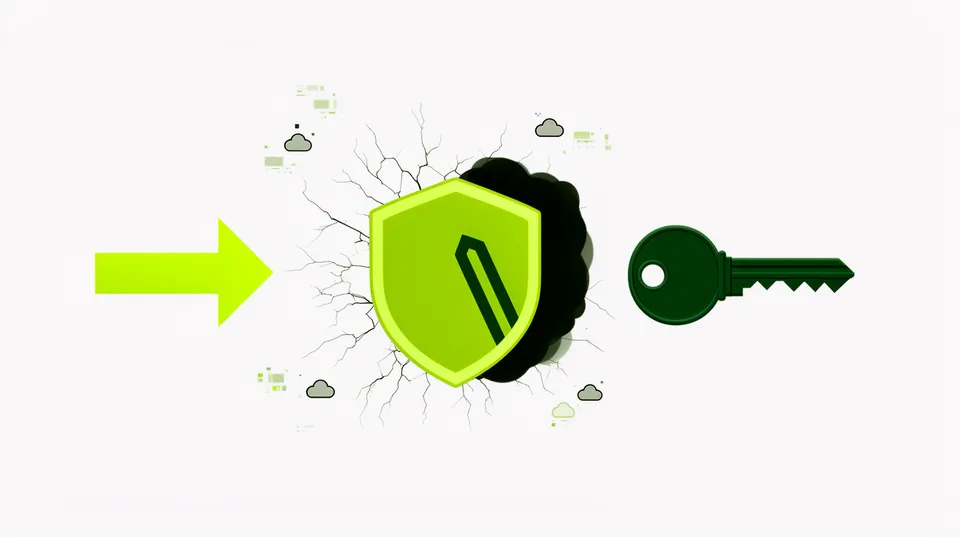

Your MFA is a locked front door, but attackers are now teleporting directly into the living room.
Multi-factor authentication was the correct response to rampant credential stuffing and password reuse. But the game has shifted from attacking the login prompt to attacking the authenticated session itself. Synthetic identity fraud, powered by deepfakes, isn't just about fooling a biometric scanner; it's about social engineering a valid user to unwittingly grant an attacker access, or manipulating post-authentication trust signals. A recent $25 million heist in Hong Kong demonstrated this perfectly, where deepfakes were used on a video call to spoof senior officers and authorize fraudulent transfers.
This isn't a failure of a single authentication factor. It's the subversion of the entire trust model. Once an attacker has a valid session token, they appear as a legitimate, MFA-verified user to your cloud environment. The defense, therefore, can't be another lock on the door. It has to be a continuous, behavior-aware security system inside the house, capable of detecting and remediating threats without burning everything down.
Deconstruct the Deepfake Kill Chain in Your Cloud
Thinking of a deepfake attack as a single login event is a critical mistake. It's a multi-stage process that exploits trust at different points within your environment. Understanding this kill chain is the first step toward building a defense that actually works.
Stage 1: Initial Access Via Session Compromise
The entry point often bypasses MFA entirely. An attacker might use a deepfake voice in a vishing (voice phishing) call to a developer, impersonating an IT support staffer. They direct the developer to a malicious site that executes an Adversary-in-the-Middle (AiTM) attack, capturing the session cookie after the developer successfully logs in with their MFA token.
Alternatively, they could convince the employee to authorize a malicious OAuth application that grants persistent access to their account. In both scenarios, the attacker never had to break the MFA; they simply sidestepped it and stole the resulting session. To the cloud provider and your internal tools, the session is completely valid and authenticated.
Stage 2: Identity Persistence and Reconnaissance
With a valid session token, the attacker now operates as the compromised user. Their initial actions are typically quiet reconnaissance. They explore the environment, listing S3 buckets, describing EC2 instances, and enumerating IAM permissions to understand what they have access to and what they can target.
Your Cloud Native Application Protection Platform (CNAPP), whether it's Wiz, Prisma Cloud, or Orca, won't see anything wrong here. From its perspective, user jane.doe is simply performing API calls that her IAM policy allows. There are no misconfigurations to flag and no vulnerabilities being actively exploited in the traditional sense.
Stage 3: Privilege Escalation and Lateral Movement
Next, the attacker seeks to expand their influence. They might use the compromised identity to message another engineer on Slack: "Hey, can you grant my role access to the production database? My permissions just expired." To add credibility, they might follow up with a quick, deepfaked voice call to create a sense of urgency.
This exploits internal trust between colleagues. If the second engineer grants the request, the attacker has successfully escalated privileges without triggering any obvious security alerts. they're moving laterally by the social fabric and assumed trust within the organization.
Stage 4: Execution and Impact
With escalated privileges, the attacker executes their objective. This could be exfiltrating terabytes of sensitive customer data from an RDS snapshot, deploying ransomware to a Kubernetes cluster, or deleting critical infrastructure. By the time the activity is noticed, the damage is already done. The audit logs will point to a legitimate user, creating confusion and slowing down the incident response process.
Layer Defenses Beyond Static MFA

Defending against this multi-stage attack requires layers that address each phase of the kill chain. A single tool won't suffice; you need a strategy that hardens the entry point, monitors post-auth behavior, and minimizes the blast radius of a compromised identity.
Layer 1: Harden the Authentication Entrypoint
While MFA can be bypassed, it's still a necessary foundation. The key is to enhance it with contextual, risk-based policies within your Identity Provider (IdP) like Okta or Azure AD. This moves beyond a simple password-and-token check to evaluate the context of the login attempt itself.
Policies should factor in signals like:
- Device Trust: Is the login coming from a known, corporate-managed device?
- IP Reputation & Geolocation: Is the request originating from a suspicious IP address or an unusual country?
- Impossible Travel: Did the user just log in from New York ten minutes ago and is now attempting to log in from Seoul?
These principles are core to the NIST Zero Trust Architecture framework, which emphasizes that trust is never implicit. Every access request must be verified. This constant verification is crucial for cloud security, where the lines between internal and external networks are blurred. You can learn more about how identity has become the new security boundary here: Identity Is Your New Perimeter.
Layer 2: Implement Behavioral Anomaly Detection
Once a user is authenticated, the focus must shift to monitoring their behavior. This isn't about setting up simplistic rules; it's about establishing a baseline of normal activity for each identity and detecting deviations. This requires ingesting and analyzing logs from sources like AWS CloudTrail, Azure Activity Logs, and Google Cloud Audit Logs.
An effective behavioral detection system should flag anomalies such as:
- A user who typically only accesses development resources suddenly starts enumerating production databases.
- An identity performs an unusual sequence of API calls, like rapidly listing and then exfiltrating data from dozens of S3 buckets.
- A service account that only runs on weekdays between 9 AM and 5 PM suddenly becomes active at 3 AM on a Sunday.
Detecting these subtle shifts in behavior is what allows you to spot a compromised identity operating under the guise of a legitimate user. It's the security camera system inside the house, watching what happens *after* someone has already been let in.
Layer 3: Enforce Just-in-Time (JIT) Access
The most effective way to limit the damage from a compromised identity is to ensure it has no standing privileges to exploit. Standing privileges,permissions that are always active,are a goldmine for attackers. Just-in-Time (JIT) access is the antidote.
With a JIT model, users and roles have zero standing permissions by default. To perform a privileged task, they must request temporary, auto-expiring access to a specific resource. This severely curtails an attacker's ability to live off the land, as a stolen session token is useless if it's not associated with any active, elevated permissions. This approach is a cornerstone of modern IAM hygiene, and you can explore strategies to eliminate standing privileges in your own environment.
Build Production-Safe Remediation Playbooks for Identity Threats
Detection is useless without a response. But in a complex cloud environment, a reflexive "auto-block user" response is a recipe for disaster. Effective remediation requires building graduated, production-safe playbooks that can neutralize a threat without causing a self-inflicted outage. The statistics are concerning; the percentage of C-suite leaders who feel unprepared for deepfake attacks grew from 6% to 28% in just one year, highlighting a pressing need for better response strategies.
A mature remediation strategy uses a tiered approach based on the confidence level of the threat indicator.
Level 1 Response (Low Confidence Anomaly)
When a low-confidence anomaly is detected,say, a login from a new city,the playbook should focus on enrichment and notification. It shouldn't take disruptive action. The automated response would be to log the event, enrich it with user context (role, recent activity), and send a low-priority notification to a security channel in Slack or Teams.
Level 2 Response (Medium Confidence Anomaly)
For a medium-confidence event, like a user accessing a sensitive resource for the first time, the response can be more active but still non-disruptive. The playbook could trigger a step-up authentication challenge via the IdP. Simultaneously, it could apply a temporary, restrictive IAM policy that removes sensitive write/delete permissions while leaving read permissions intact, preventing a workflow interruption.
Level 3 Response (High Confidence Threat)
When a high-confidence threat is detected,for instance, a user attempting to disable logging or exfiltrate large volumes of data,the response must be decisive. The playbook should immediately revoke all active sessions for the user via IdP API calls and apply a deny-all IAM policy to the user's account. It should then automatically generate a high-priority incident ticket in your ITSM tool with all the enriched context for the SOC to begin investigation.
A critical component of safe automation is generating fixes as code. For example, instead of an automation tool directly modifying an IAM policy in your production AWS account, it should generate a Terraform HCL or a JSON policy document and submit it as a pull request. This keeps your GitOps workflow intact and allows a human to review and approve the change.
Here's an example of a temporary isolation policy that could be automatically generated:
{ "Version": "2012-10-17", "Statement": [ { "Sid": "AllowReadOnlyDuringInvestigation", "Effect": "Allow", "Action": [ "s3:GetObject", "s3:ListBucket", "ec2:Describe*", "rds:Describe*" ], "Resource": "*" }, { "Sid": "DenyMutatingActions", "Effect": "Deny", "Action": [ "s3:Put*", "s3:Delete*", "ec2:RunInstances", "ec2:TerminateInstances", "iam:*Policy*", "iam:*Role*", "iam:*User*" ], "Resource": "*" } ]
}
This policy allows the user to continue viewing resources, preventing a hard stop to their work, but explicitly denies any actions that could modify or delete infrastructure. For more on this topic, see how to manage the risks of automated changes with production-safe remediation playbooks.
Connect Your CNAPP Alerts to IAM Remediation
The final piece of the puzzle is connecting your detection tools to your remediation engine. A CNAPP like Wiz is great at finding a static misconfiguration, such as an overly permissive IAM role. A behavioral tool is great at finding an anomaly, such as that role being used from a strange location. The real power comes from correlating these signals.
With deepfake fraud attempts having surged over 2,000%, a reactive approach is no longer viable. The workflow should look like this:
- Detection & Correlation: A CNAPP alert for "IAM role
ecs-app-rolehas admin privileges" is ingested. Moments later, a CloudTrail anomaly shows that role was assumed by a new user from an untrusted network. - Enriched Alerting: An intelligent remediation platform like Tamnoon correlates these two weak signals into one high-confidence alert. The risk isn't just the permissive role; it's the permissive role being used in a suspicious manner.
- Targeted Remediation: The automation doesn't just block the user. It targets the root cause. The playbook generates a pull request to right-size the
ecs-app-rolepolicy based on its actual usage data, stripping it of admin privileges and adhering to the principle of least privilege.
This closes the loop from detection to remediation. It's a durable fix that reduces the attack surface for the next attacker, rather than just playing whack-a-mole with suspicious user sessions. The goal is to move beyond alerts and toward a self-healing infrastructure where IAM vulnerabilities are fixed as code, swiftly and safely. Get started by exploring how to build a mature cloud remediation workflow.

Tamnoon helps security teams remediate cloud risks faster with AI-augmented managed services — combining human expertise with automation so nothing falls through the cracks.
Learn more at tamnoon.ioFAQs
Why isn't MFA enough to stop deepfake identity attacks?
MFA is vulnerable because attackers are no longer primarily focused on breaking the authentication prompt. Instead, they exploit the human element to bypass it and steal the session token *after* a successful login. For instance, using a deepfake voice in a vishing call, they can trick an employee into navigating to an adversary-in-the-middle (AiTM) site that captures their session cookie. Once the attacker has this token, they have an authenticated session and MFA becomes irrelevant for its duration. The defense must therefore focus on monitoring post-authentication behavior, not just strengthening the login gate.
How do deepfake attacks bypass traditional cloud security tools like CNAPPs?
CNAPPs like Wiz or Prisma Cloud are designed to analyze the configuration state of cloud resources, not the intent or legitimacy of an authenticated user's actions. When an attacker uses a deepfake-compromised identity, they operate with valid credentials and permissions. From the CNAPP's perspective, an authorized user is performing authorized actions. The tool sees a valid principal making valid API calls and won't flag this activity unless it directly triggers a pre-defined configuration rule. It lacks the behavioral context to distinguish a legitimate user's normal activity from an attacker's malicious actions.
What is a practical example of a deepfake defense?
A practical defense is continuous post-authentication verification coupled with Just-in-Time (JIT) access. For example, a developer who normally only works with dev servers in `us-east-1` suddenly uses their valid session to access a production RDS database in `eu-west-1`. Anomaly detection flags this deviation from their baseline behavior. An automated, production-safe playbook could then trigger a step-up MFA challenge and, more importantly, a temporary IAM policy that revokes their access to that production database until identity is re-verified, neutralizing the immediate threat without taking down their entire account.
Can automated remediation be safe for identity threats?
Yes, if it's designed with a 'human-in-the-loop' philosophy and avoids knee-jerk reactions. Instead of automatically locking a user account and potentially causing a production outage, a safe automated system generates a fix as code. For instance, upon detecting a compromised identity using an over-privileged role, the system can draft a Terraform pull request that restricts the role's permissions. This PR is then sent to the appropriate DevOps or security team for review and approval, combining the speed of automation with the judgment of a human expert to ensure the fix is safe to deploy.
How does a platform like Tamnoon connect IAM alerts to fixes?
Tamnoon acts as a correlation and remediation engine. It ingests alerts from multiple sources, such as a CSPM finding (e.g., 'overly permissive role') and a SIEM alert (e.g., 'anomalous login activity for that role'). By connecting these dots, it identifies a high-confidence threat. Instead of just flagging the user, Tamnoon's playbook targets the root cause—the overly permissive role. It generates a specific, context-aware fix, like a Terraform or Pulumi pull request, that right-sizes the IAM policy to least privilege, and routes it to the asset owner for review. This fixes the underlying vulnerability, not just the immediate incident.